I know you want to get right to the pasta. A good friend (who frequents websites for recipes) has made it clear to me that no one wants a bunch of intro writing and fluff on those recipes. So, thank you for your indulgence while I give a bit of history on this recipe – if for nothing else to assure you it’s been in the works a LONG time. You can always just scroll down for the recipe ♥
I’m Italian. Not just a little bit or in the nebulous sense, my great grandparents we raised in a tiny village “in the palm of God’s hand.” A few years ago, my family visited our cousins in Palmiano, Italy and it was like a light bulb moment. It’s a farming commune in the food-centric area of Ascoli Piceno. Our family specialized in luxurious foods like truffles, cured ham, and wine.
 Me in front of the home my great-grandmother was born and raised in
Shortly thereafter my mom (who was adopted) discovered her own genealogical heritage, and much to both our surprises – more Italian. Loving good Italian food is in my blood. Problem is, because of autoimmune diseases I can’t eat gluten or tomatoes. What kind of torture is that?! But, that doesn’t mean the end of pasta – in fact, it makes more sense that because of my history and health I’d learn how to make good fresh pasta. I didn’t though.
It wasn’t until this fall, on a work trip in California where I earned a MYO pasta class that the magic finally came together. The resort had a huge on-site commercial cooking facility for teaching, and the chef accommodated me by coming up with a recipe for me. The experience of seeing how easy and fun it was filled me with a sense of pride and fulfillment. I knew I had to recreate it at home.
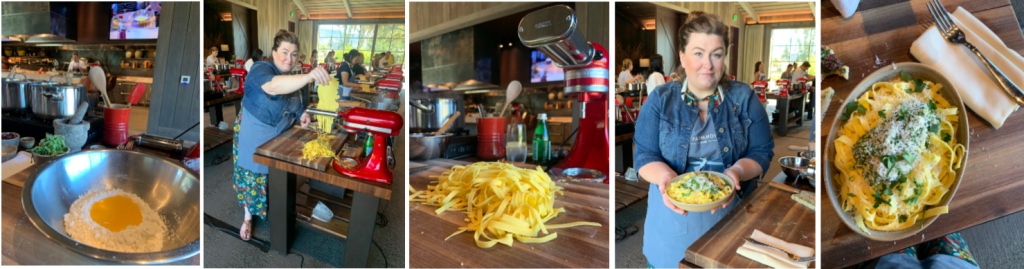
I immediately ordered a pasta attachment and sent it home. But, it wasn’t until Russ from The Domestic Man was visiting, however, that we actually played with and tested recipes. With a boost of confidence from him, I present to you the absolute best and not-at-all-intimidating-I-promise-you-can-do-it-and-it-will-be-fun-recipe for fresh homemade classic egg pasta, made gluten-free.
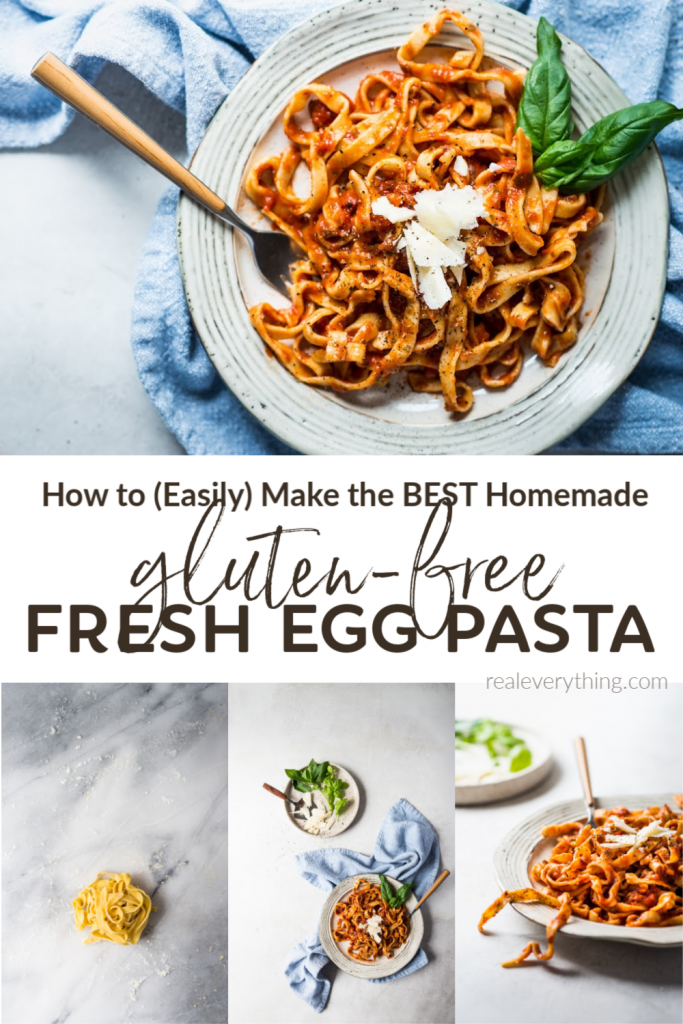
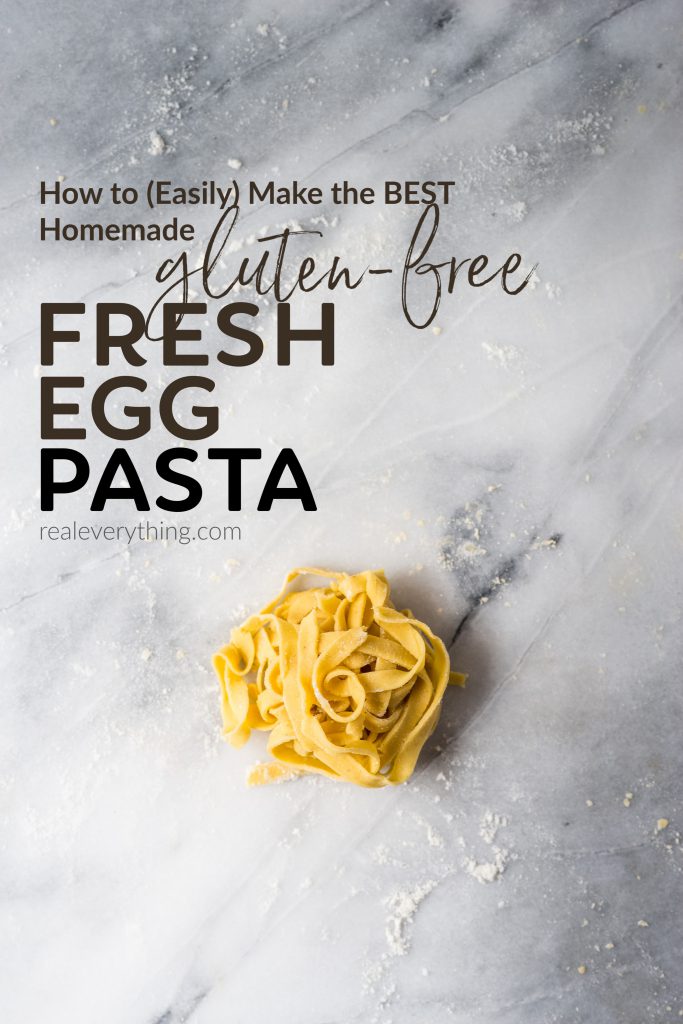
While it’s something we seldom eat, I’ve come to treasure pasta. No matter your history or food intolerances, I hope you too can come to enjoy the pillowy goodness and the magical experience of making your own fresh egg pasta. This recipe works for fettuccine, as shown, but we also plan to use it for ravioli and lasagna.
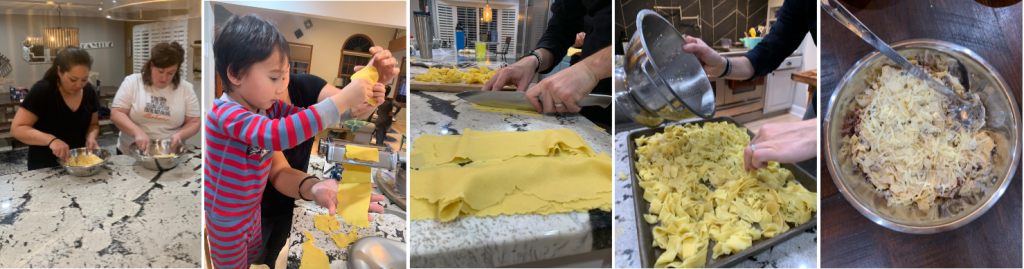
If the flour blend we suggest doesn’t work for you, play around. There’s really nothing to lose with how simple and quickly it comes together! I highly recommend this as a group activity, with little hands invited to help!
Notes
- Read this whole recipe before starting. Things will escalate quickly, and you’ll want to set-up your stations before jumping in.
- This recipe is specifically for a pasta maker attached to a kitchen aid mixer; while I’m sure you can adapt to whatever maker you have, I cannot speak to those adaptations. This was super simple and easy, highly recommended!
- We doubled the batter, and did go by weight. One was perfect, but dried out more quickly. The other we added an extra yolk because the dough didn’t come together as well. That one was more pliable to work with. Don’t be afraid to focus on the batter to the correct texture. That might mean not being exact with measurements!
- If you are doubling this recipe, make one at a time. You cannot possibly run all the pasta through the machine of one batch without the other starting to dry out. The longer the nests sit out, the more they will dry and stick together when cooking. You want to touch them as little as possible or they’ll fall apart!
Ingredients
- 10 ounces (280g; about 2 cups) all-purpose King Arthur gluten-free flour*, plus more for dusting
- 2 whole large eggs (110g; about 4 ounces)
- 4 yolks from 4 large eggs (70g; about 2.5 ounces)
- 1 teaspoon kosher salt, plus more for salting water
- salt and oil of choice for boiling (last step)
Instructions
- Most people will tell you to work on a large, clean work surface; if you want to do that, great. If you don't want dough everywhere, and want an easier time mixing your dough I recommend a wide mouth bowl as long as the bottom is flat and at least 8" across. I used the largest of this set. From there, pour flour in a mound - then use your fingers to push flour out of the center, into a "well." Make the well in the center about 4 inches wide. In separate bowls, separate eggs then combine the wet ingredients and beat with a fork. Pour lightly beaten eggs and salt into well. Use the fork to scoop the edge of the flour into the center of the well, a little bit at a time, gently beating and combining the eggs and flour as you turn the bowl. If you don't use a bowl, you'll need to rotate your arm around the flat surface... see why I recommend breaking with tradition?! When combined, gradually incorporate flour into the eggs until a wet, sticky dough has formed. About half way through your dough will start to come together well, and then about 3/4 through will start to get too crumbly to combine. That's when to dump it out onto the working surface and start to combine with your hands.
- Using your hands, scrape excess dough from fork and fingers out of the bowl. Begin to fold remaining flour from the bowl into the dough, turning the dough roughly 45 degrees each time, not yet pressing the dough out but working the smaller crumbs of dough into the ball until about 95% is in the ball, 2 to 5 minutes. You don't want to overwork the dough and still have the true working of the dough next, so do this as gently and quicky as you can to simply combine flour with eggs.
- Next, sprinkle a tad of flour on the surface if it's porous, to prevent dough from sticking. Once combine, press the heel of your hand into the ball of dough, pushing forward and down and into and upward motion as you push fully out. Then with the tips of your fingers pull that edge back into the ball, folding in on itself. Rotate the ball 45 degrees and repeat; about 8-12 times total; until dough develops a smooth texture similar Play-Doh. If dough feels too wet, add flour in 1 teaspoon increments. If dough feels too dry, add egg yolk 1/4 of a yolk at a time.
- For gluten pasta you wrap in plastic and let rest for the proteins to develop. GOOD NEWS, we don't need to do any of that. GF pasta actually ends up being more quick and easy because of this!
- If working on a porous surface, place a sheet of parchment paper on a tray or cutting board and dust lightly with flour. I used granite that has been properly sealed and had no issues working on the surface and didn't even need to dust with flour. Be aware as you work and see if the dough is drying out from too much dusted flour (don't want that) or sticking to the surface (and needs a dusting). Cut dough ball into quarters. Set one quarter on work surface and cover remaining dough with slightly damp towel. With a rolling pin, flatten the quarter of dough into an oblong shape about 1/2 inch thick. The goal here is as long and evenly flat as possible.
- Set pasta maker to widest setting (8) and pass dough 2 times through the machine at this setting with your Kitchen Aid mixer on level 4 for motor speed (we will maintain this speed throughout).
- If your dough stays together and doesn't tear at the edges, you're ready to go to the next step. If it is pulling and separating, you want to make the dough less wide, and try again. You would fold both ends in so that they meet at the center of the dough, and then fold the dough in half where the end points meet, trying not to incorporate too much air into the folds. Using rolling pin, flatten dough to 1/2-inch thick. The key here is reducing width, so press the torn edge inward and combine with the layer it just combined with. Then, when the shape is thin enough, and less wide, pass through the rollers again (2 times at width 8).
- Narrow the setting by 1 double notch (6) and repeat Step 7. Ideally, not needing to roll out any further at this point. For us, at level 6 we ran it through, reduced the width to 4, then ran it through again. Continue passing the dough through the rollers, reducing the thickness each time until it reaches the desired thickness. We recommend stopping at 4 if you're going to use a pasta cutting attachment, or going from a 4 to a 3 if making your own and cutting by hand (like ravioli, lasagna, or wide noodles) It should now be very delicate, and slightly translucent.
- Place rolled dough onto a work surface, loosely folding the dough over as necessary so that it fits; cover with the slightly damp cloth until ready to cook or store.
- Keep dough covered with slightly damp kitchen towel to prevent drying, then repeat Steps 5 through 9 with remaining dough quarters. If making noodles, cut dough to preferred size segments (12-14" long is recommended).
- Adjust pasta machine to noodle setting of your choice. Working one dough segment at a time, feed dough through the pasta-cutter. Alternatively, cut folded dough by hand with a chef's knife to desired noodle width.
- Divide the cut noodles into individual portions and curl into a nest. return under towel until ready to cook. Pasta can be refrigerated for 48 hours (the eggs are raw, don't eat them or leave them in the open air) or frozen directly on the baking sheet, transferred to a zipper-lock freezer bag, and stored in the freezer for up to three weeks before cooking. Cook frozen pasta directly from the freezer.
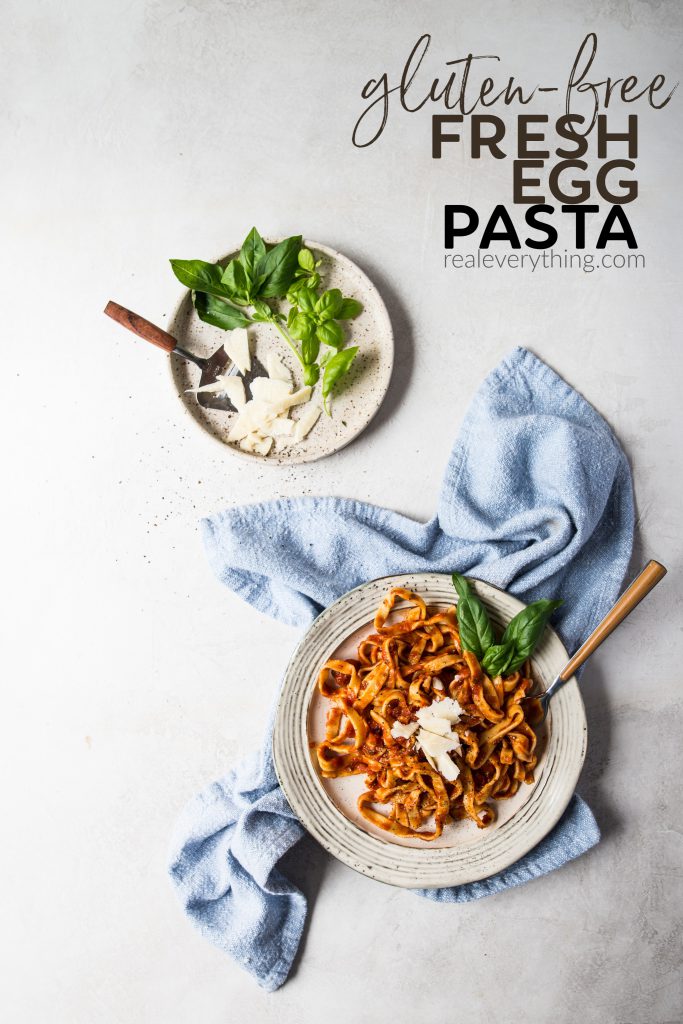
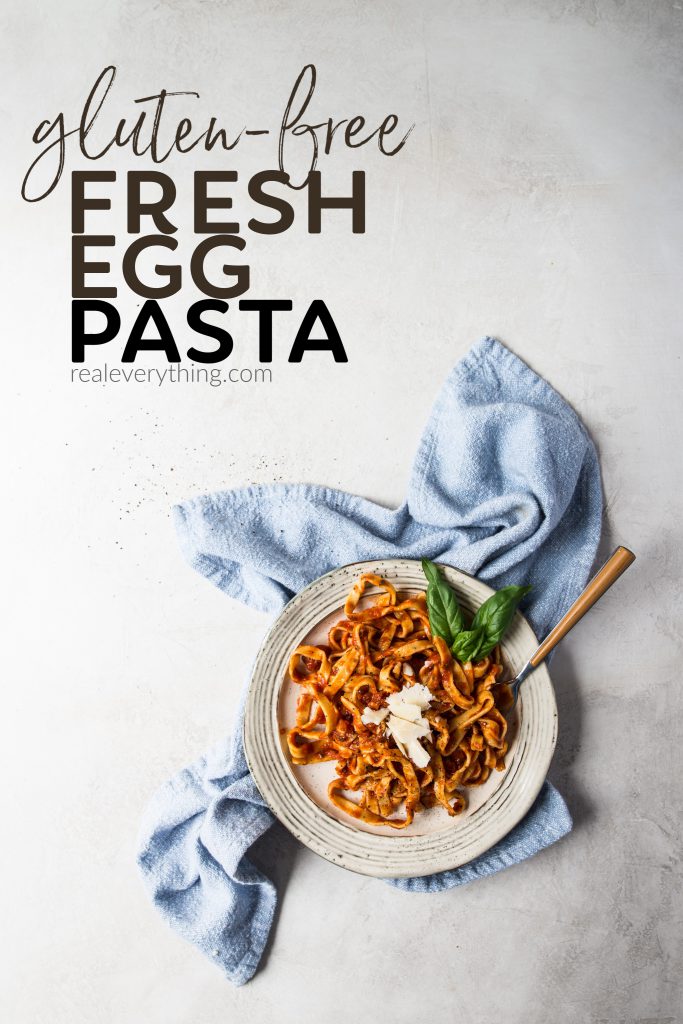
- Bring a large pot of very salty water to a rolling boil. Add oil before adding in the pasta. There's no flavor in this pasta, you've got to add it to the water, trust me; and the oil will help prevent sticking! Add pasta, stir gently with a spider, wooden spoon, chopsticks, or a cooking fork, and cook, tasting at regular intervals until noodles are just set with a definite bite, about 1 minutes. Drain, toss with oil or butter, then sauce, and serve.
Notes
*this plug is not sponsored; other brands may work well, grain-free flour blends may even work, but this is the easiest to work with and what we can specifically say our recipe works with
Recipes this pasta would work well with:
Note: we based our original recipe on Serious Eats Classic Fresh Egg Pasta recipe, and Russ highly recommends that website when you’re looking to research any recipes!
Photos by the incredible Trisha Hughes
If you love this recipe post and want to be kept up to date on everything Real Everything, sign up for our Real Everything Newsletter!
If you’re more interested in non-toxic living, and safe skincare and personal products, sign up for our Healthy Inside and Out Newsletter! Signing up for either one will allow you to download a free ebook!