When I was growing up, a special treat for me was tapioca pudding. I loved all the little “bubbles” and always wondered why they never popped. Now I’m old(er) and wise enough to know the answer. Well, I know enough to be able to explain to the kids that tapioca pearls aren’t really bubbles but rather made of cassava root and are in fact just tiny balls of starch that happen to cook into transparency.
After a recent cooking class at the best Thai restaurant in our area (Thai Basil), I wanted to adapt a recipe I learned there for our family to enjoy and remember how fun tapioca pudding can be. Normal tapioca pudding is full of the little tapioca bubbles as well as lots of sugar and dairy. This recipe is much more Paleo(ish) with less tapioca and sugar than normal as well as healthy fat from coconut instead of cow’s milk. Still, it’s not the healthiest thing you could make, but its Thai inspired deliciousness nonetheless. If you’re trying to lose weight I’d say share a bite or two and leave the rest for the kids!
Banana Tapioca Pudding
dairy-free, egg-free, peanut-free, wheat-free, soy-free, treenut-free, shellfish-free, fish-free
6 Bananas
1 14 oz can of coconut milk
2 C water
1/3 C palm sugar
1/4 tsp salt
1/3 C tapioca pearls (NOT instant tapioca)
- ♥ Rinse tapioca pearls in cold water
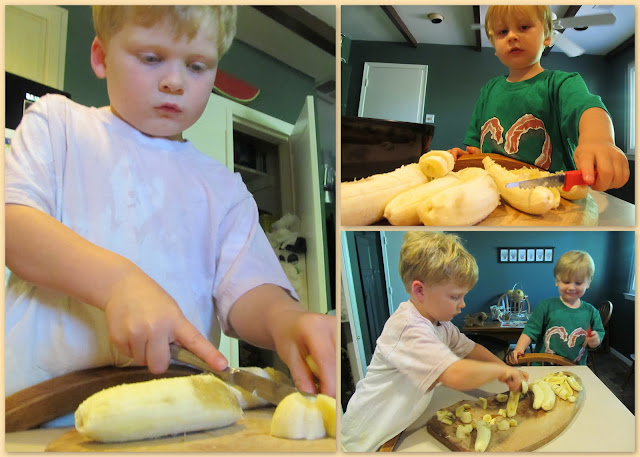
- ♥ Slice bananas into 1/2 inch half rounds (or any bite size shape the little hands choose)
- ♥ Combine coconut milk, water, sugar and salt in pot over medium heat
- ♥ Stir continuously for 2-3 minutes over medium heat, until sugar is dissolved
- ♥ Add rinsed tapioca pearls and bananas
- ♥ Check and stir occasionally while mixture cooks over medium heat (10-20 minutes)
- ♥ Have little eyes watch to let you know once tapioca is translucent, then remove from heat and it’s ready to eat!
Serve hot or cold. Store in an airtight container in the refrigerator for several weeks.
Provides 10-12 servings and leaves 3/4 of the tapioca leftover in the bag – which is found affordably and easily at any Asian food market if you’re having trouble finding it locally.
Note: All steps which include the heart symbol ( ♥) are steps your children can do with you!

As seen above, we use jack-o-lantern knives for children not quite adept enough to use “real” knives. We call it a “safe cutter” because it would be nearly impossible to hurt one’s self on the blunt tip and dull edges, but the serrated teeth work wonders on quite a few fruits and veggies! Next November 1st, bulk up on the post-Halloween clearance sales and let your kids go to town!


